The Art of the Wunderlich Cube - MathLapse
película
Licencia
Créditos
- Animation
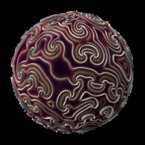
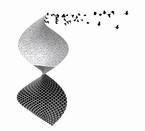
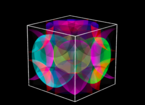
We define a Wunderlich cube to be a cube whose surfaces contain raised impressions of the reflections of seed shapes resembling the letter S. The video shows how this cube can be rolled leaving a trail which can become the Wunderlich curve.
Walter Wunderlich is attributed with the discovery of three space-filling curves called Wunderlich curves. In contrast to the Hilbert curve, which involves a square of size 2n x 2n, Wunderlich curves involve squares of size 3n x 3n.
A Wunderlich curve is constructed using rotations and reflections of an initial seed shape to create patterns which can be connected to form a space-filling curve. Wunderlich curves can be constructed iteratively in a fairly intuitive fashion. In this video we take a look at the first Wunderlich curve, which we will simply refer to as the Wunderlich curve.
The Wunderlich curve shown in the video is constructed using a seed shape similar to the letter S, and its 90 degree rotation. Using these shapes, a 31 x 31 cell grid can be tiled in a checkerboard-like fashion. The shapes in the tiling can then be connected to create the Wunderlich curve. A larger Wunderlich curve can be created by using the 31 x 31 pattern as the seed pattern to “tile” a 32 x 32 cell grid.
We define a Wunderlich cube to be a cube whose surfaces contain raised impressions of the reflections of seed shapes. The video shows how this cube can be rolled leaving a trail which can become the Wunderlich curve.
The storyline for this video was created as follows: First, an initial model of the Wunderlich cube was developed using LEGO bricks. Second, a Bricklayer program was written to create a virtual representation of the Wunderlich cube. The still picture of the cube shown in the video is a POV-Ray rendering of the Wunderlich cube created by our Bricklayer program. Bricklayer was also used to create a 3D printed version of the Wunderlich cube. The 3D printed cube, Play Doh modeling clay, moon sand, and slime (white glue and Borax) were used to storyboard animation ideas. Of course we had children help us in this stage (as well as in the initial LEGO stage). Fun was had by all. And finally, a javascript program was written to realize the animation.


