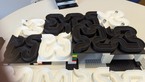
Twelve Algebraic Sculptures
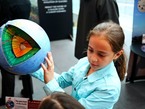
hands-on
Licence
Credits
- 3D-Data Modelling
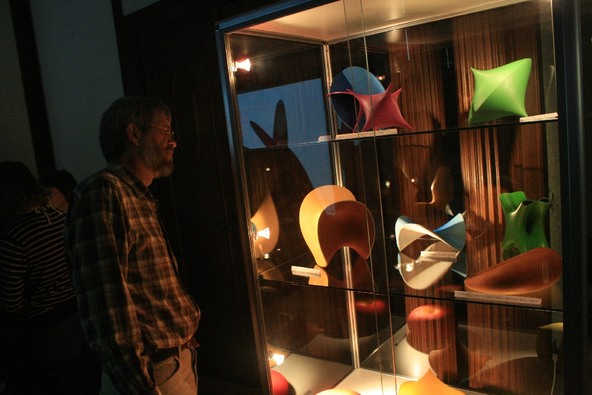
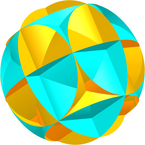
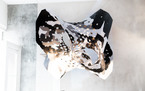
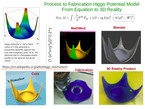
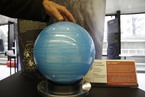
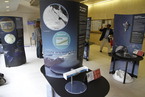
For the exhibition “IMAGINARY - through the eyes of mathematics” we printed twelve algebraic surfaces as 3d-sculptures using additive manufacturing techniques. Since the surfaces were only available in an implicit way (as the zero set of an algebraic equation), we first had to produce the necessary explicit 3d-data (triangle mesh). Please find here the resulting stl-data. We hope you find it useful to produce the sculptures with your (or any) 3d-printer. However, some modifications are likely to be necessary. They are mentioned and partially linked to in this text.
In order to produce an algebraic surface as a 3D sculpture we first need a dense triangle mesh to describe the surface. In generating these triangles it is essential to preserve particularly beautiful vertices and sharp edges. In addition, having regard to the properties of materials and machine resolution, unbounded and infinitely thin surfaces can only be imitated in the model.
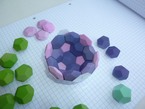
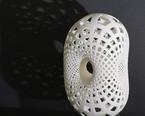
Massive and thin-walled modelsBounded surfaces originally were computed as massive models. In our compilation those are: ‘croissant’, ‘distel’, ‘dullo’, ‘kreisel’, ‘nepali’, ‘zitrus’.
Please note that cost for material and machine time depends on the used additive manufacturing technique. The original target technique, powder binder jetting, performs equally fast for massive models as for hollow ones. Additional cost for powder and binder for massive building was neglectable. However, both is completely not true for other additive manufacturing techniques like SLA, SLS, FDM and low cost 3d-printing. So you may clearly prefer hollow body versions of these models for your printer.
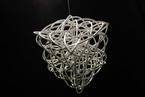
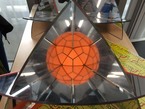
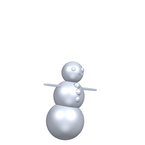
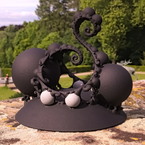
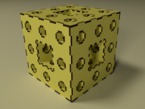
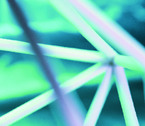
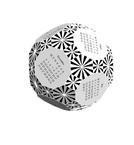
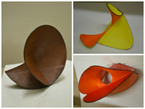
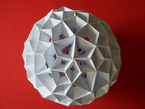
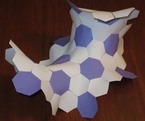
Unbounded surfaces are trimmed by e. g. a cuboid or a sphere. In our compilation those are: ‘calypso’, ‘helix’, ‘schneeflocke’, ‘spitz’, ‘tülle’, ‘vis-a-vis’.
As such trimmed unbounded surfaces don’t enclose any volume, they can not be printed in this original state. Solid walls with sufficient thickness were computed for them, based on the surface. One side of this wall preserves as many surface details as possible. The thickening for those files in the archive was done with regard to a specific scale and specific material properties of the target material. Other material may need thicker walls.
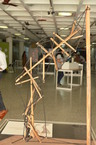
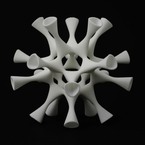
Please note, the ‘helix’ stl in the download archive will still need a second thickening step or printouts will fall apart. The sponsors of the original sculptures added and merged two long, thin cuboids along the crossing of axes at his site. The modified file is not available here. Thickness of this cuboid is material specific. Of course, the ‘calypso’ model given here will immediately break at the point of singularity. Here too, an add on construction is needed. Our
sponsor added three pillars to connect the upper and lower part with sufficient strength at his site. Again, this modification is not available as stl here. You may find that pillar design is a question of taste anyway and want to design your custom pillars. As well as pillar design is a question of scale and specific material properties…
For the exhibition, a target size of 24cm and, for trimmed unbounded surfaces, a wall thickness of 3.5mm or 5mm, respectively had been chosen. In some cases, scale was applied to the models on the fly. These stl data appear to be ~1mm in size, hence. You will need to scale the stl data to a size that you see fit for your purpose.
3D-printers and all other additive manufacturing devices pursue the idea to assemble three-dimensional models by layers located one on top of the other and connected with one another. With that in common, the available techniques differ greatly in their restrictions as well as in their need for additional constructions. The stl files here are provided without any support. Also, no regard was taken to model orientation for the original series. The original models have been produced using the powder binder jetting technique by Voxeljet, Augsburg. This particular technique neither is restrictive to orientation nor does it need any support. You probably will have to address that issues when producing your own sculptures, however. Please regard this paper by M. Rainone, C. Fonda, E. Canessa who did a great job producing 3d-sculptures from our files using low cost 3d-printers. They describe tools and some necessary conversion techniques.
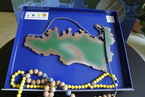
Positioning and colouringExhibiting models like ‘calypso’, ‘distel’, ‘kreisel’, ‘vis-a-vis’, ‘zitrus’ greatly benefits from adding specific sockets. Again, sockets are a question of personal taste. You can use free software like MeshLab to apply a boolean operation to carve a perfect fit notch into your custom socket to perfectly hold and present your printout.
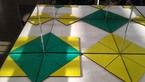
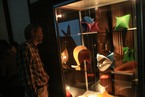
Finally, the bridging between algebraic surfaces and modern digital mould construction ends up with the finishing of the extremely delicate geometries which are now getting their colouring in the hands of the model maker. The stl data are not coloured. We coloured the sculptures manually, however.
To do this, you basically need information of your material supplier about suitable solvents to really clean the models from dust and any fat. After cleaning, primer ought to be applied to the models, e. g. by spray can. Finally, we used acrylic paint spray cans to imitate the wonderful colouring of Prof. Dr. Herwig Hauser’s posters. As some
models need an infiltration step with resin as a post processing, that resin can be coloured with different colours and be locally applied with brushes and so model can get coloured, too. Please note that using incompatible solvents will destroy your models, though. Preferrably try the cleaning and colouring on an expendable part like a tensile bar before ruining your valuable models.
The 3D-data files have been prepared by FORWISS, University Passau. These files are not meant to cover all additive manufacturing related issues, but to open the door. Please check for related work adressing different additive manufacturing techniques, e. g. here.
We appreciate contributions of CAD files and descriptions that facilitate producing the models with additional additive manufacturing techniques.